
To maintain optimal airflow and keep your environment healthy, regular upkeep of your filtration system is essential. Begin by referring to the manufacturer’s manual for guidance specific to your model. Different systems may have unique requirements that will greatly influence the process.
Ensure you have the appropriate tools and new replacements ready before you commence. Common tools might include a screwdriver and a vacuum cleaner for debris removal. Prioritizing cleanliness during this process will enhance the performance of your system.
Managing these elements can significantly prolong the lifespan of your equipment. Set reminders for regular maintenance intervals, commonly every 3 to 6 months, depending on usage and environmental factors. Through consistency in care, you’ll ensure that your indoor atmosphere remains pure and pleasant.
Identifying the Right Air Filter for Your System
Check your system’s manual for specific dimensions, type, and compatibility of the cleaning component. Most devices utilize HEPA, activated carbon, or fiberglass options, so understanding your equipment’s requirements is key.
Verify the MERV rating, which measures filtration efficiency. Higher ratings capture smaller particles but may restrict airflow. A rating between 7 and 13 is often a balanced choice for residential use.
Inspect the installation area for any unique features or constraints. Measurements must be precise, ensuring a snug fit that promotes optimal airflow while facilitating maintenance. If your setup has specific requirements, make a note to acquire the appropriate variant early on.
Evaluate the frequency of changes based on your environment. Homes with pets or high allergen levels may demand more frequent check-ups. Recording the timeline of your maintenance can streamline future tasks.
Consider DIY options available in local shops or online marketplaces. Custom-sized options may also be available if standard dimensions don’t match. Prioritize trusted brands known for reliability and performance.
Tools Required for Air Filter Replacement
Gather a flat-head screwdriver or a Phillips screwdriver depending on your unit’s requirements. A pair of needle-nose pliers can help in removing stubborn components. Ensure you have a vacuum cleaner or a brush to clear any debris around the area.
Protective gloves will shield your hands from dust and allergens. A work light can be useful for illuminating darker spaces during the process. For easier handling and installation of new screens, consider having a step stool if access is limited.
Keep a damp cloth handy for cleaning surfaces post-removal. If you’re changing multiple types of screens, a label maker or a marker can assist in organizing them for each specific spot. Make sure to have replacement screens on hand to ensure a smooth transition.
Step-by-Step Instructions for Replacing Your Air Filter
Gather necessary tools: a screwdriver, a vacuum, and a new filter suited for your model. Ensure the device is off to avoid any accidents.
Locate the compartment housing the filter. This is typically near the main unit or inside the return air grille in your home. Remove any screws or clips securing the cover.
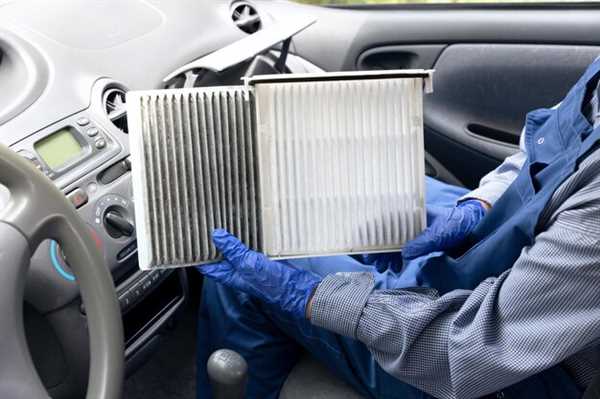
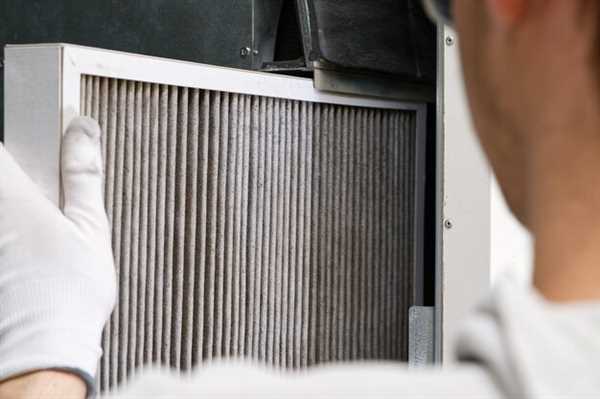
Take out the old filter carefully. Inspect it for dust buildup and check the direction of airflow marked on the filter. This will guide the orientation of the new one.
Clean the compartment using a vacuum to eliminate any debris or dust accumulated inside. This step ensures optimal performance and longevity of your new filter.
Insert the replacement in the same position as the old one, following the airflow direction markings. Ensure a snug fit to avoid any gaps where unfiltered air could pass through.
Reattach the cover and secure any screws or clips that were removed. Turn the system back on and monitor its performance to confirm everything is working smoothly.
Regular maintenance of your home’s air quality system can enhance efficiency and prolong its lifespan. Performing this simple task can contribute significantly to improved air quality in your living space.


